Table of Contents
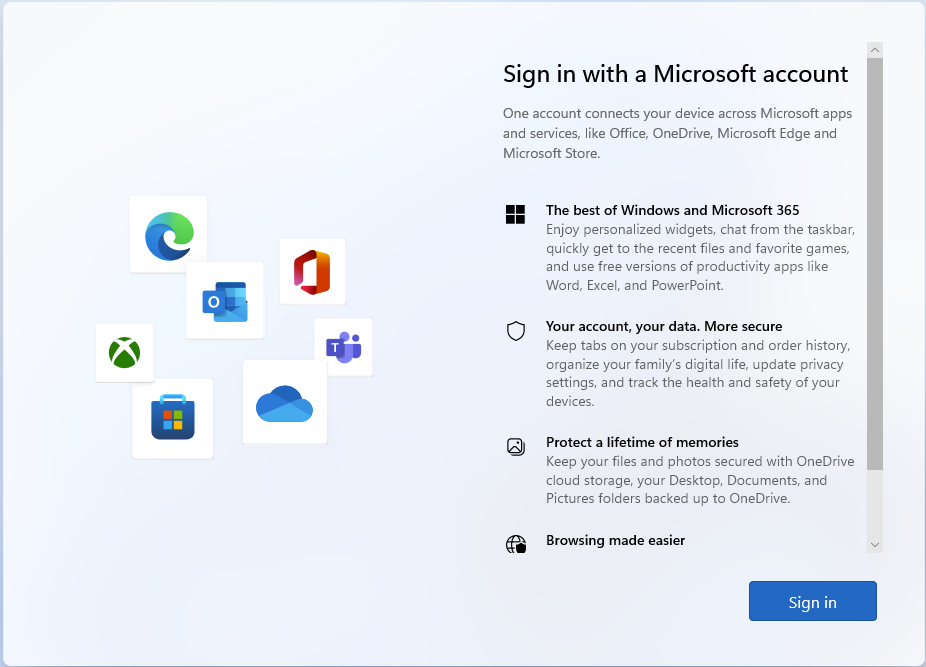
Starting with Windows 11, Microsoft has made it more difficult for users to complete Windows 11 setup without internet connection or logging into a Microsoft account. If you’re used to the good old days of installing Windows and creating a local account without jumping through hoops — you’re not alone.
In this guide, we’ll show you how to install Windows 11 without internet, bypass the Microsoft account requirement, and regain full control over your setup process. Whether you’re setting up a new PC or doing a fresh install, these methods will help you proceed on your own terms.
Why Microsoft Wants You Online
During the out-of-box experience (OOBE), Windows 11 Home and Pro editions now enforce online sign-in. Microsoft pushes users to connect to the internet and sign in or create a Microsoft account — making local account setup nearly impossible without a workaround.
This has led many users to look for ways to skip network setup in Windows 11 or avoid linking their installation to a Microsoft profile.
If you’re looking for a privacy-first experience, completing your Windows 11 setup without internet gives you more control and fewer background apps.
Many advanced users now prefer a Windows 11 setup without internet to avoid syncing personal data by default.
Method 1: Windows 11 Setup Without Internet: Bypass Using Command Prompt
This is one of the simplest methods to bypass both the internet and Microsoft account requirement.
- Start the Windows 11 installation as usual.
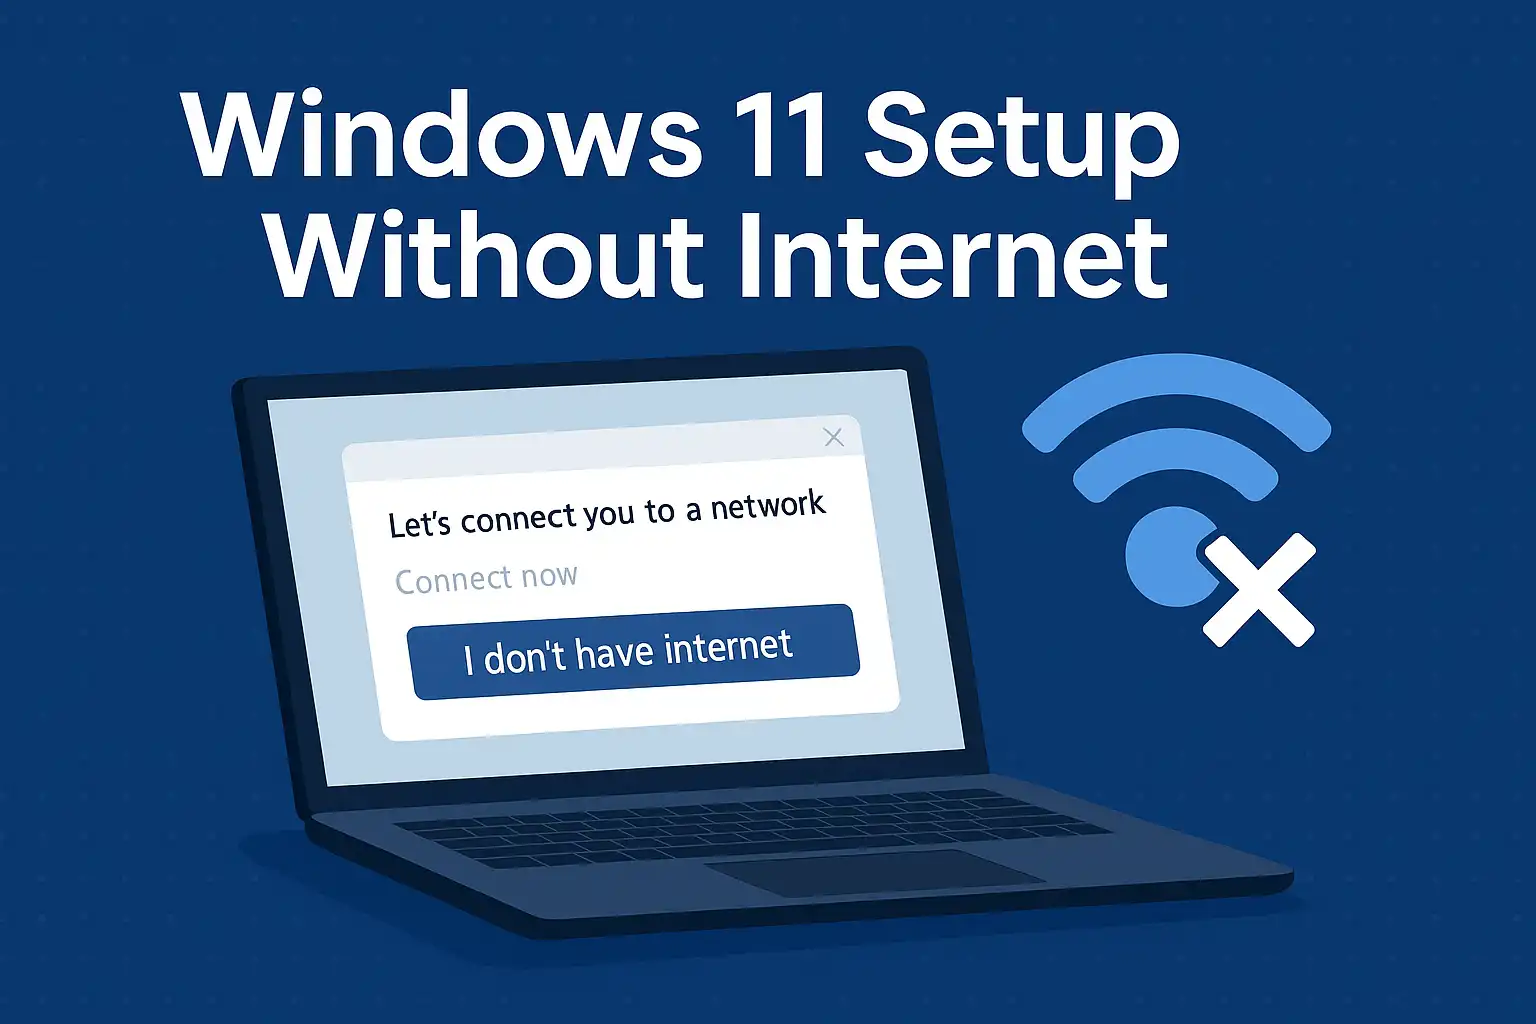
- When you see the “Let’s connect you to a network” screen, press Shift + F10 to open Command Prompt.
- In the Command Prompt window, type the following and hit Enter:
OOBE\BYPASSNRO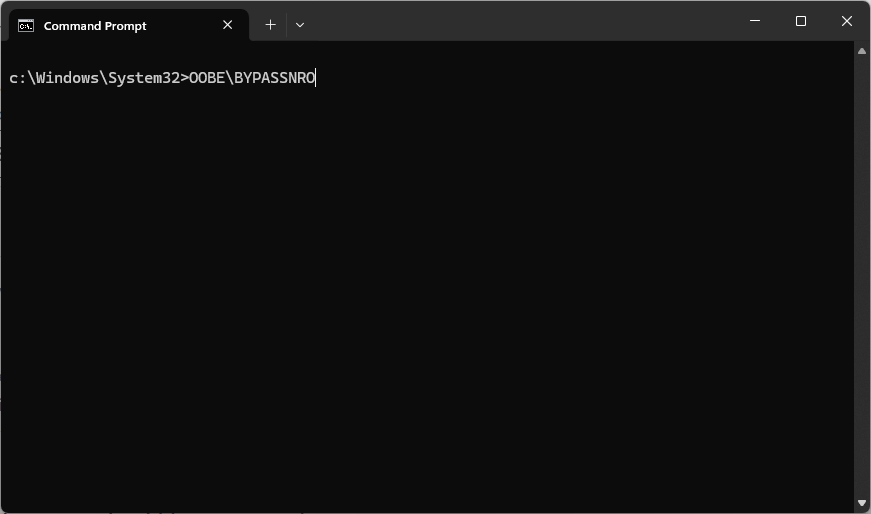
Windows will reboot and take you back to the setup process — this time with a new option: “I don’t have internet”.
- Select “I don’t have internet.”
- Then choose “Continue with limited setup.”
- Now you’ll be able to create a local user account and finish the installation offline.
Method 2: Create a Local Account via Hidden Command
This lesser-known trick allows you to launch the local account setup interface directly:
- At the same “Let’s connect you to a network” screen, press Shift + F10.
- Enter the following command and hit Enter:
start ms-cxh:localonlyThis will immediately bring up the local account creation screen. Enter your preferred username, password (optional), and proceed to finish setup without a Microsoft account or internet access.
Why Use a Local Account?
Here are some reasons users prefer installing Windows 11 without a Microsoft account:
- Increased privacy — no syncing with Microsoft cloud services
- Faster installation process
- Less telemetry and fewer background apps
- More control over your Windows experience
Important Considerations
- Microsoft can patch these workarounds in future updates. If you’re using the latest ISO, test before deploying on multiple machines.
- Some features like OneDrive, Microsoft Store personalization, and sync settings will not be available with a local account.
- You can always link your Microsoft account later under Settings → Accounts → Your Info.
Conclusion: Setup Windows 11 Without Internet Like a Pro
While Microsoft is making it harder to avoid their online ecosystem, you can still install Windows 11 your way. With the help of hidden commands like OOBE\BYPASSNRO and start ms-cxh:localonly, it’s completely possible to skip the Microsoft account setup and go fully offline.
Whether you’re a system builder, privacy-conscious user, or just setting up a basic offline machine — these steps help you regain control of your setup process.
Bookmark this page for the next time you or a friend is stuck at that stubborn “Let’s connect you to a network” screen.
Need more Windows tips? Check out our other guides like How to Force Quit on Windows or How to Take a Screenshot on Windows.
For official documentation, you can visit Microsoft Windows Support.
Happy offline computing! ⚡